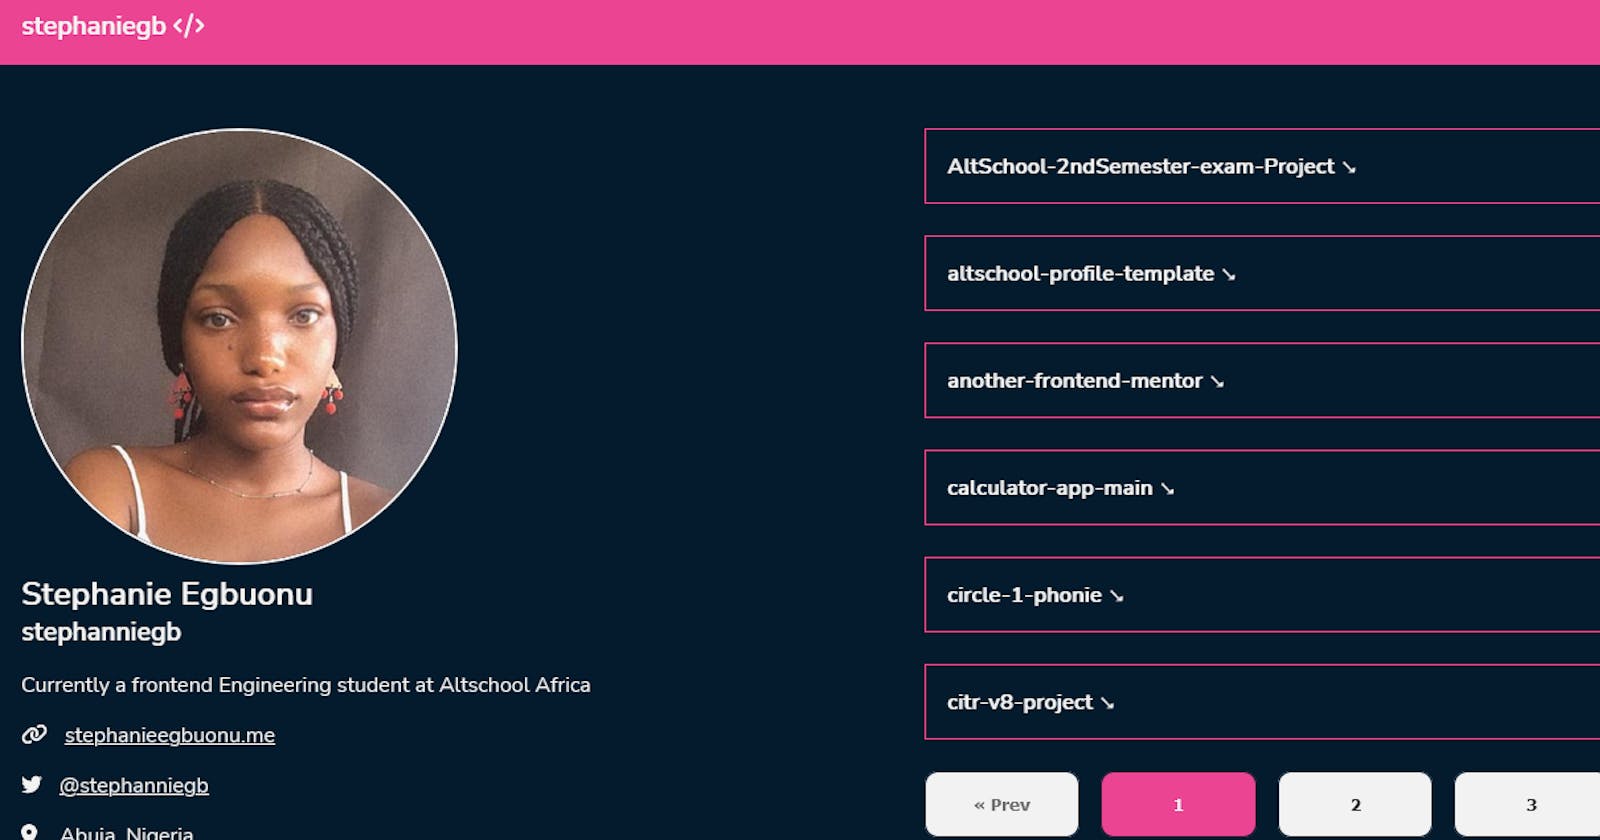
GitHub is a platform for code hosting and collaboration, It is a popular platform used by many developers, students, programming instructors and enterprises. In this project, I recreated my GitHub portfolio using React.js and CSS. This project was built in partial completion of my second semester at AltSchool Africa. I want to share with you how I implemented some features that make this app special 😊.
In this article, I assume you Have an understanding of Javascript, React.js and React router
The task
Implement an API fetch of your GitHub portfolio, show a page with a list of all your repositories on GitHub(the page should implement pagination for the repo list), and create another page showing data for a single repo clicked from the list of repos using nested routes while using all the necessary tools in react. Implement the proper SEO, Error Boundary (show a page to test the error boundary) and 404 pages. Good UI and Designs are important.
My process
Built with
Semantic HTML5
CSS
ReactJs
React router
Steps
First, I created react application boilerplate with create-react-app.
npx create-react-app my-app
In the src folder, I created a folder called components where I organised my work into different components.
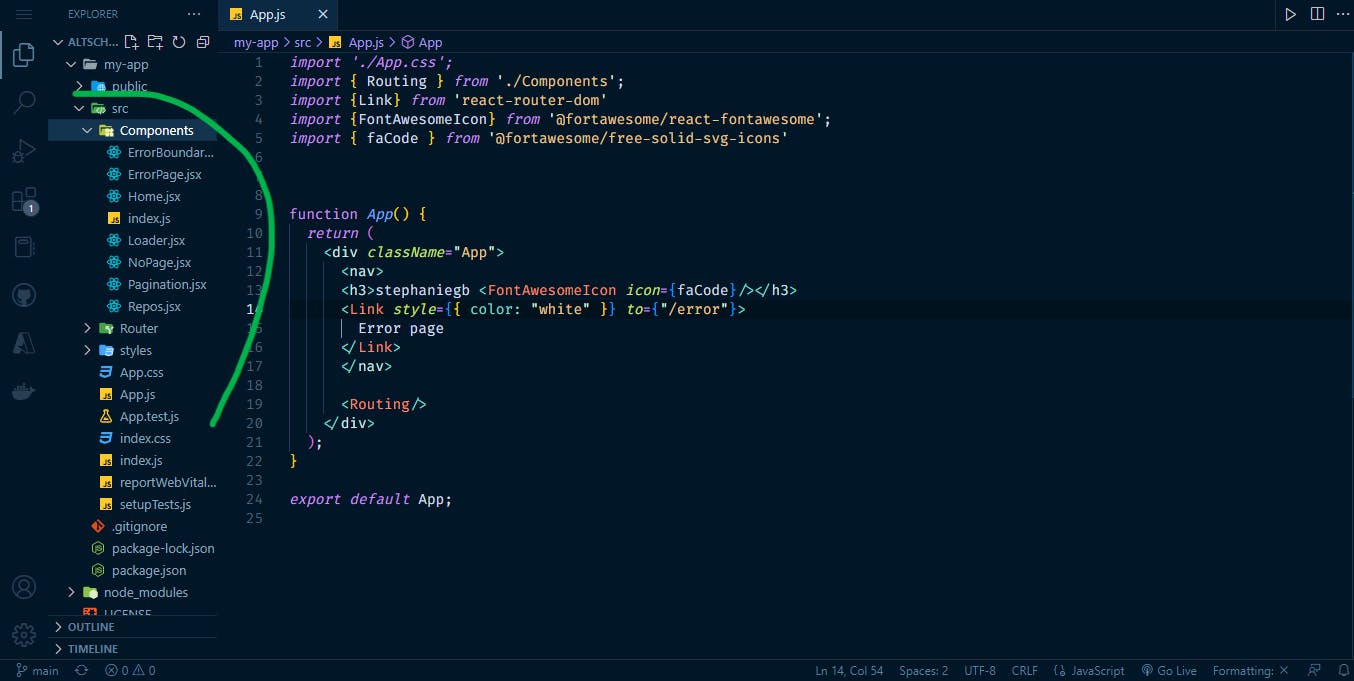
How I implemented the API fetch
I started this project by implementing an API fetch of my GitHub portfolio in Home.jsx.
Firstly, I Imported useEffect and useState from react.

Then I created state variables inside Home.jsx to store the responses from the API fetch. The state will update as soon as the server sends the response.

I created an async / await function called requestGithub that made the API fetch request to the GitHub API.
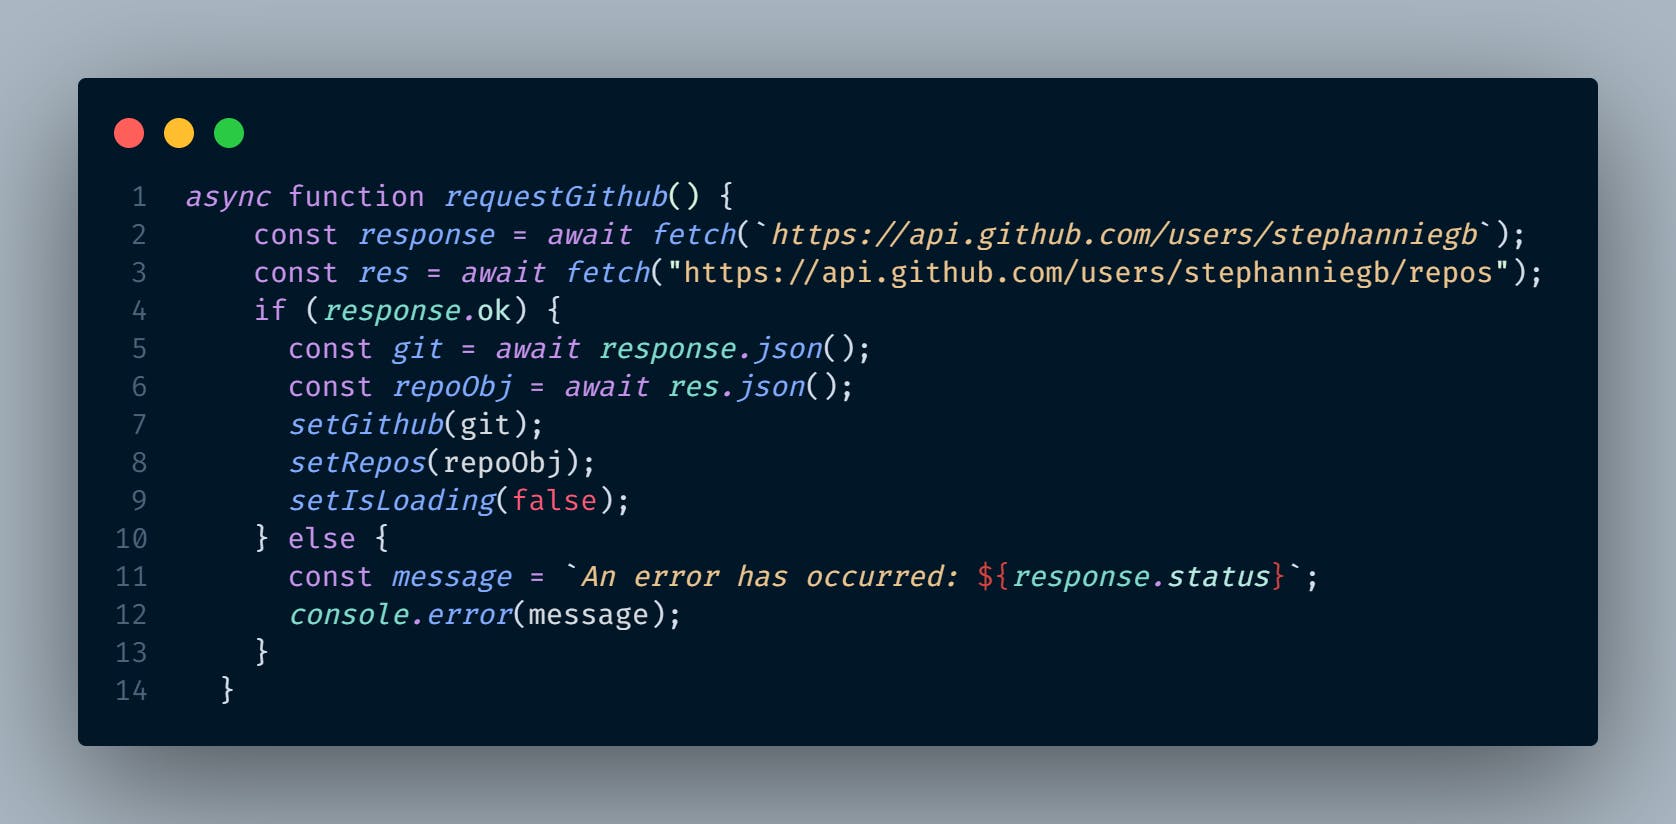
I called requestGithub() inside of a useEffect hook, and for the second argument of the useEffect, I passed in an empty array (ie the dependency), this is so that the application makes the fetch request only once when it loads.

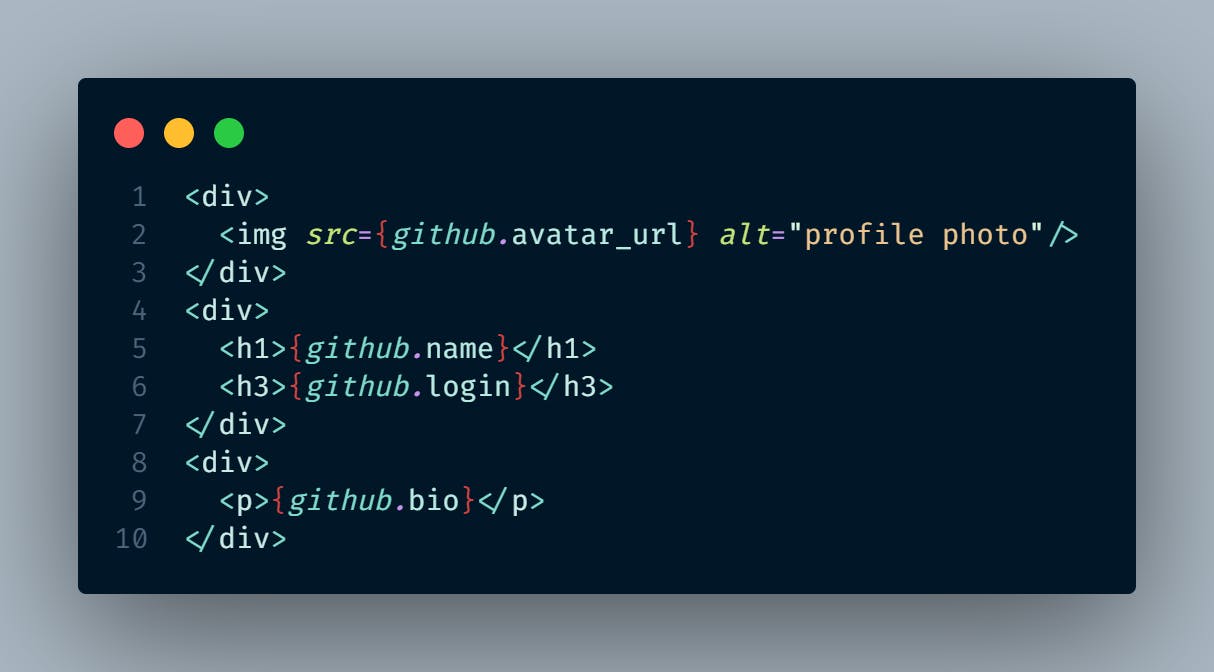
The response on github state variable I created earlier is an object, so I destructure it with dot notation to extract the data and then returned them as jsx.
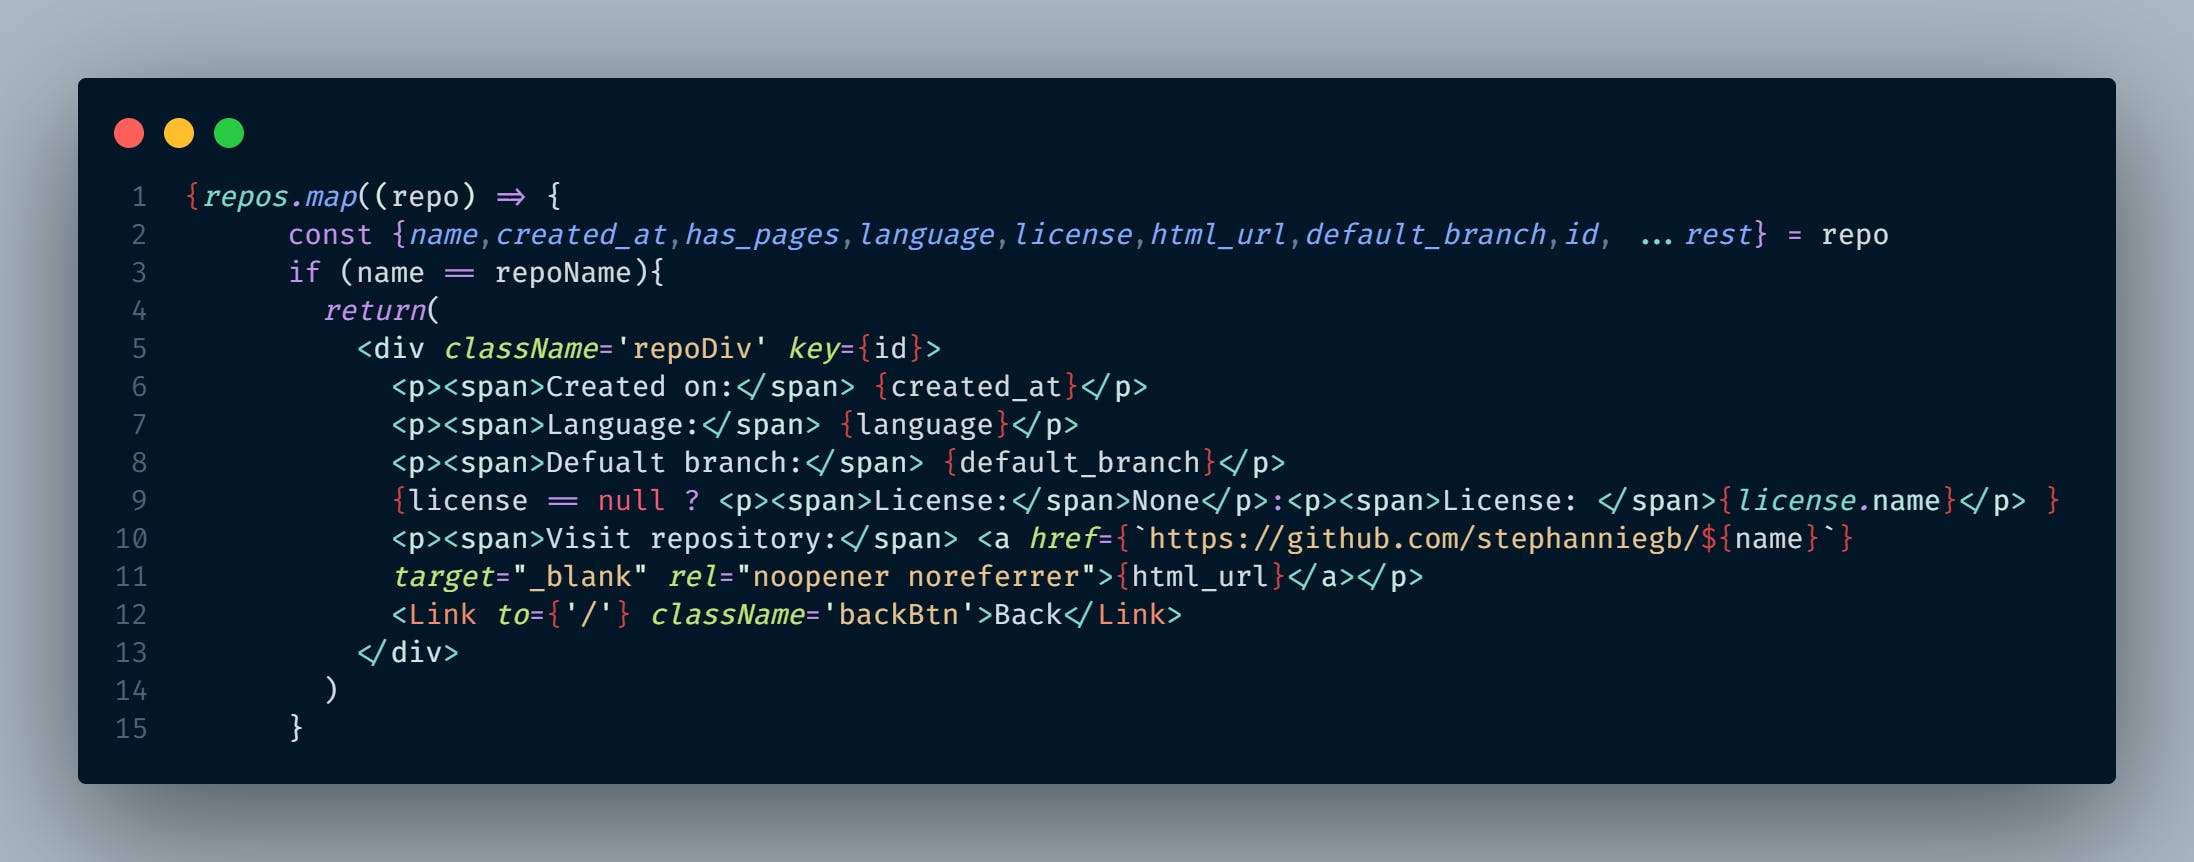
The response on repos state variable I created earlier too is an array of objects. I iterated through repos using the JavaScript map() method, destructured the object to extract the data and returned them as jsx in repos.jsx file.
How I set up pagination
Pagination is a process that is used to divide large data into smaller discrete pages. Where a user can use links such as "next", "previous", and page numbers to navigate between pages, it enables a dynamic display of one page of results at a time.
I implemented pagination using useState hook
Firstly, I started by creating the variable postPerPage, which specified the number of items that will be displayed on each page.
Then I created a state variable called currentPage, I set the initial value of currentPage to 1
The state property currentPage determines the page that will be displayed. As it changes the displayed page changes too.

I declared variables called lastPostIndex and firstPostIndex. They are the numbers which I used with the slice() method to make a copy of a selected portion of the array with the data that will be paginated (ie. repos ).

I saved the array returned from slicing repos as currentPosts. currentPosts stores the portion of repos that will be displayed. if currentPage changes, currentPosts changes too as its value depends on the value of currentPage.

Next, I needed buttons...
I implemented buttons with numbers based on the total number of pages that will be available, by declaring a variable called totalPost which is the total number of items in the repos array.

then I created an array that had the total number of pages that were available.

I mapped through the pages array, returning buttons displaying each page number.
I added a click event listener on each button with a function that will set the currentPage to the number on the button.

For the Next and Prev buttons,
I created two functions that handled click events on the next and prev buttons.
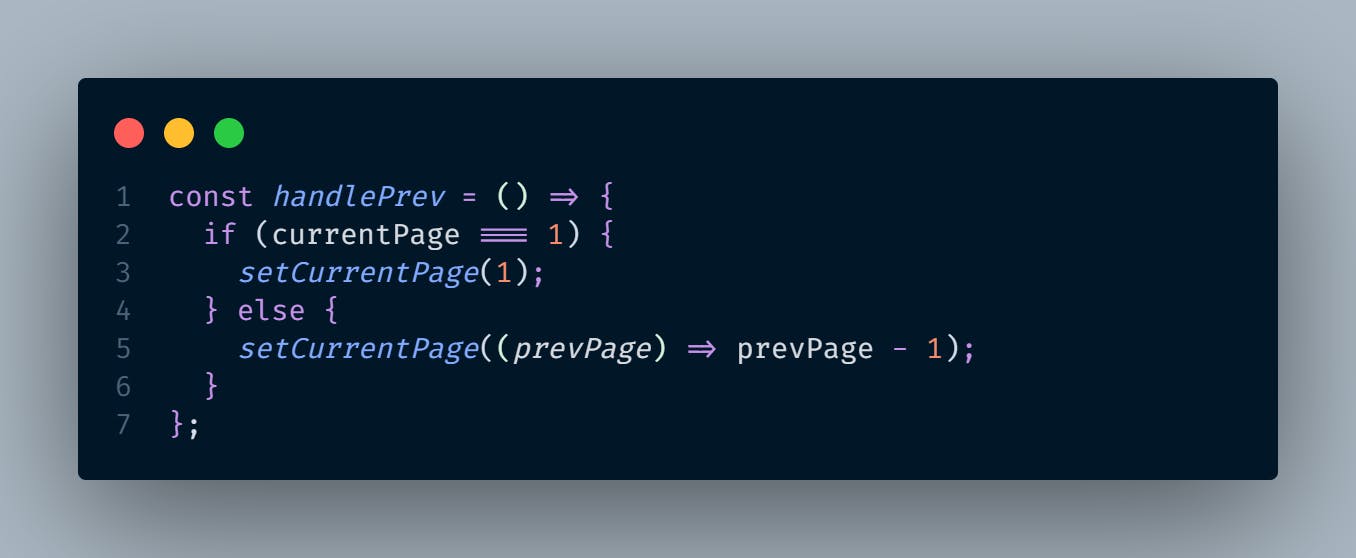
The first function handlePrev() decreases the value of currentPage by 1 when the "prev" button is clicked on the UI and also disabled the button when the last page is reached.

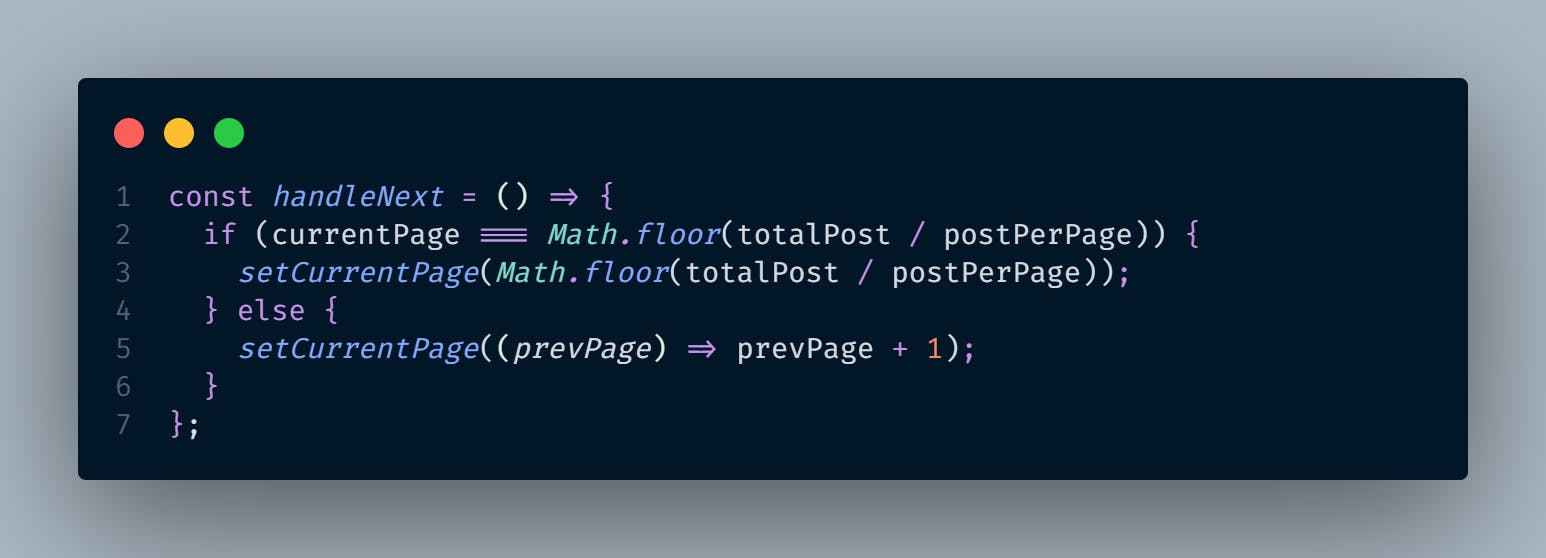
The second function handleNext() increases the value of currentPage by 1 when the "Next" button is clicked on the UI and also disabled the button when the last page is reached.

How I set up nested routes
I started out by installing react-router-dom to my project
npm install react-router-dom
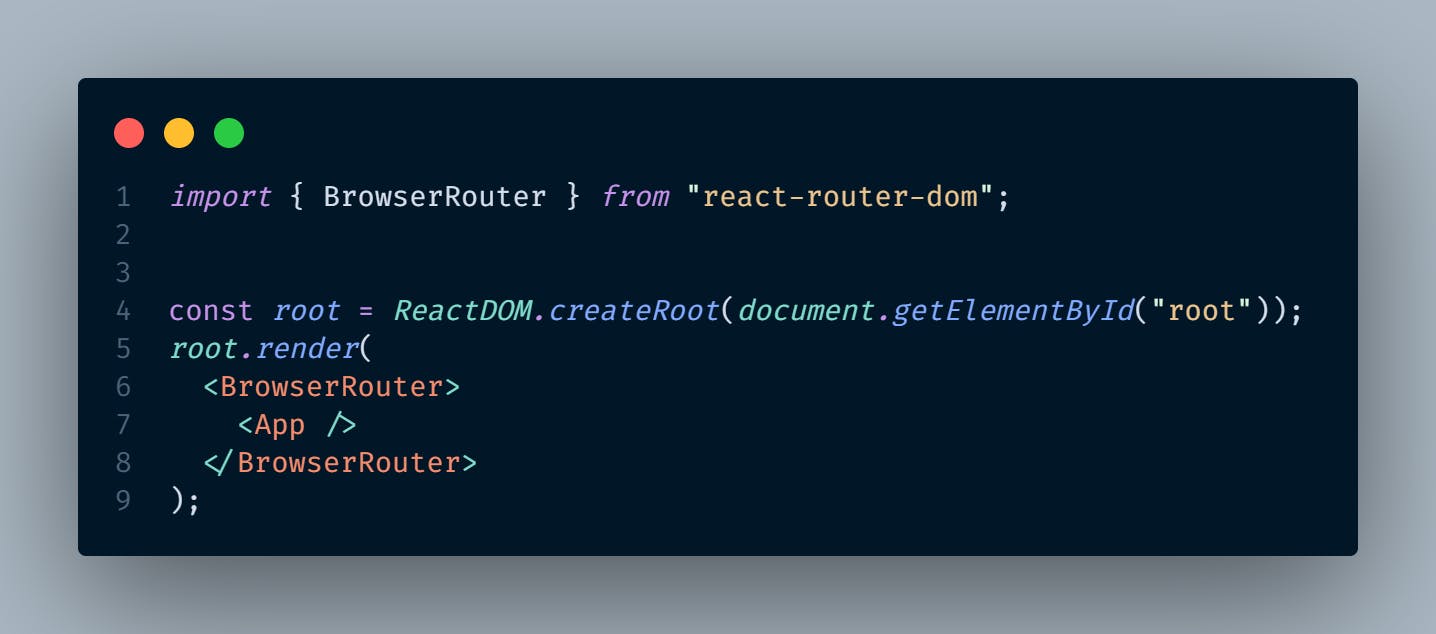
Then I imported BrowserRouter from react-router-dom and wrapped the App component with it inside of the index.js file in the src folder.
for organisational purposes, I created a Routing.jsx file.
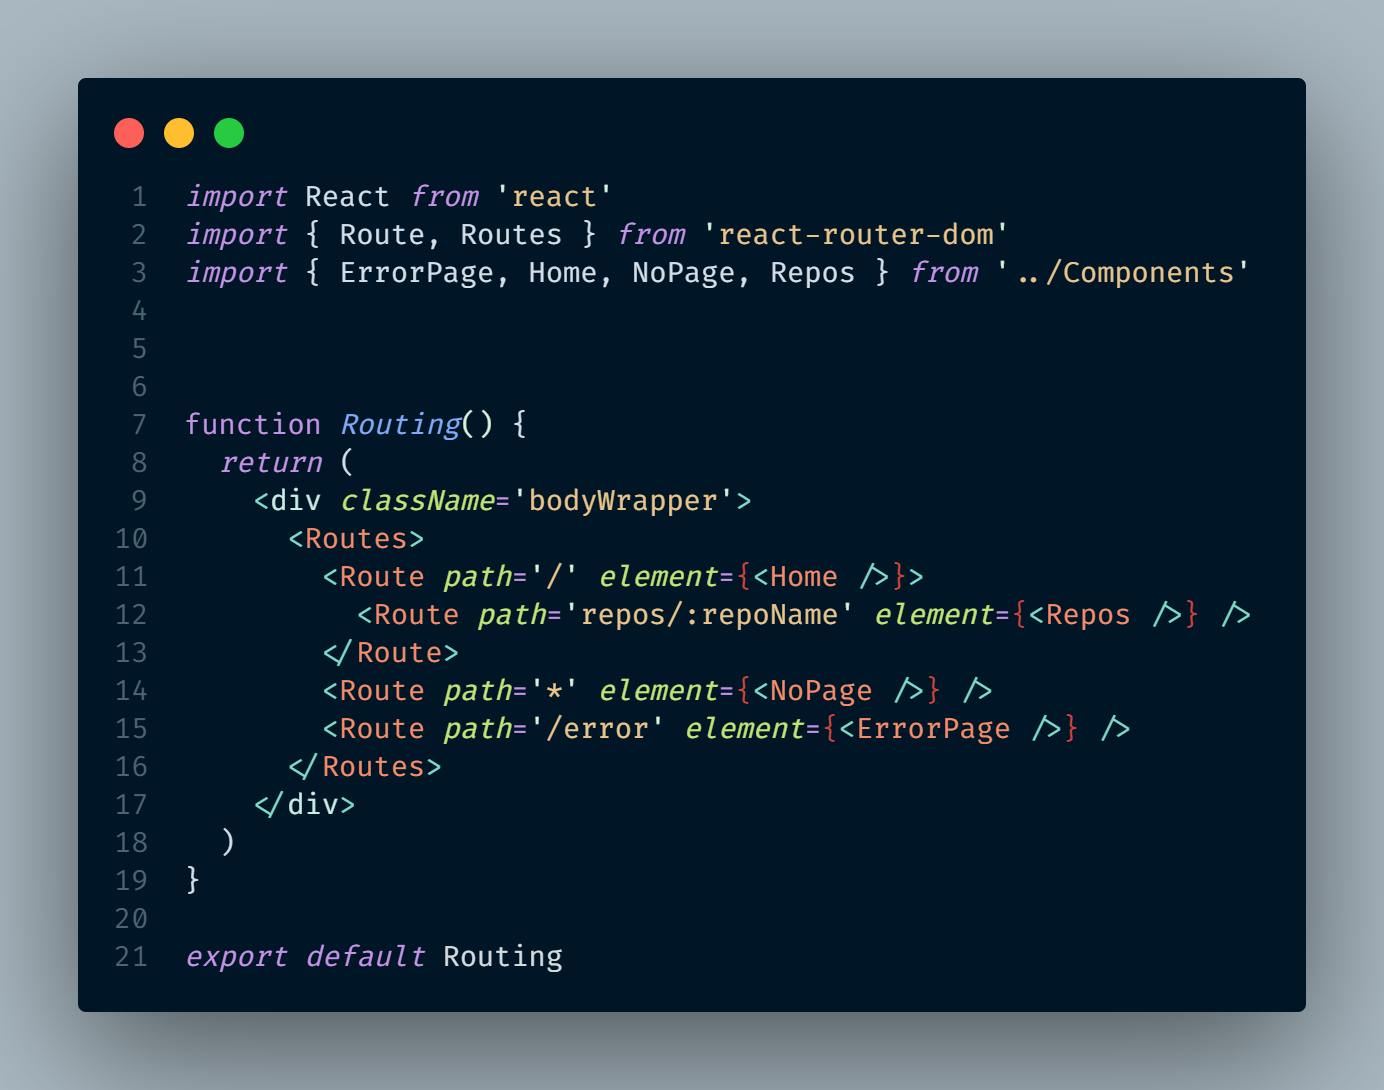
In the Routing.jsx, I created 3 routes which include, the error page, the home page (which has the nested routes) and a 404 page.
Firstly, I imported Routes and Route from react-router-dom.
Then I implemented a shell of routes, the outermost component was Routes which wrapped the Three (3) Routes
I provided the Routes with their various path and element(component), the path for the 404 page is an asterisk.
I embedded a child Route in between the home page Route which I also provided with a path and an element.
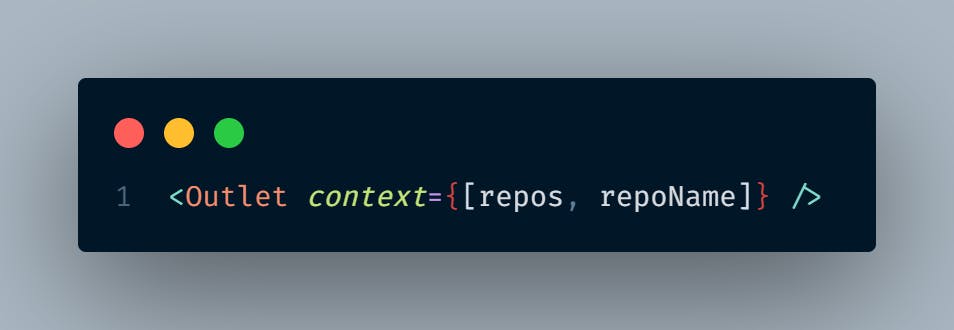
In the Home.jsx, I imported Outlet from react-router-dom
Outlet servers as a placeholder and tells react where to render the nested child of Home component (ie Repos). I added the Outlet component to my jsx.
I used Context from react-router-dom to pass props from the parent route down to the nested route and used useOutletContext from react-router-dom to access the props inside the nested route

How I set up the error boundary
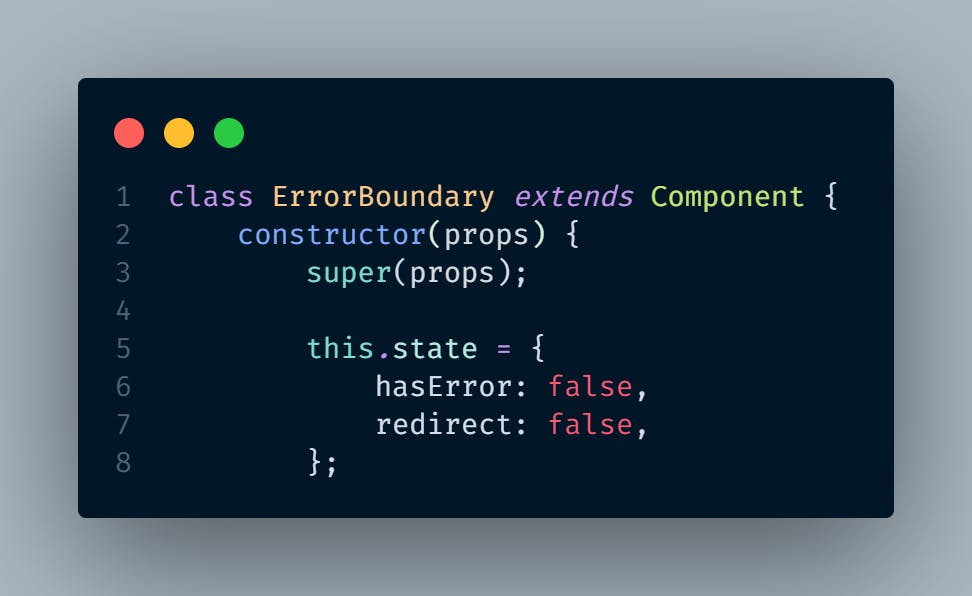
First I created a react class component called ErrorBoundary.jsx
In ErrorBoundary.jsx, I created a state variable called hasError.
I set hasError to false.
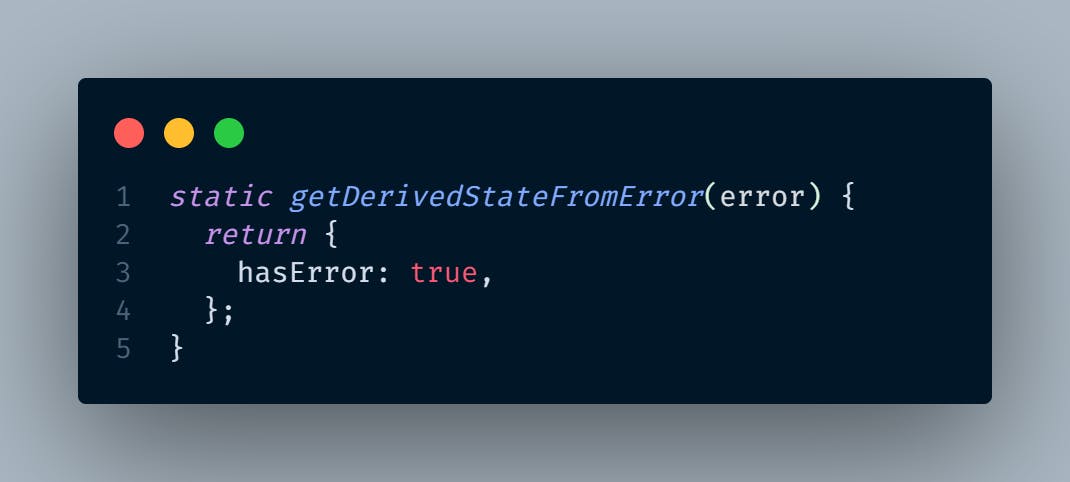
Then I defined the getDerivedStateFromError life cycle method.
This method receives the error as a parameter and returns the new state, if there is an error, hasError is set to True.
This state property is what is used to render the fallback UI.
I also defined the componentDidCatch life cycle method, it took two (2) parameters, error and info.
I used this method to log the error to the console.

in the render method, I implemented conditional rendering, to conditionally return the fallback UI or return this.props.children (the component).
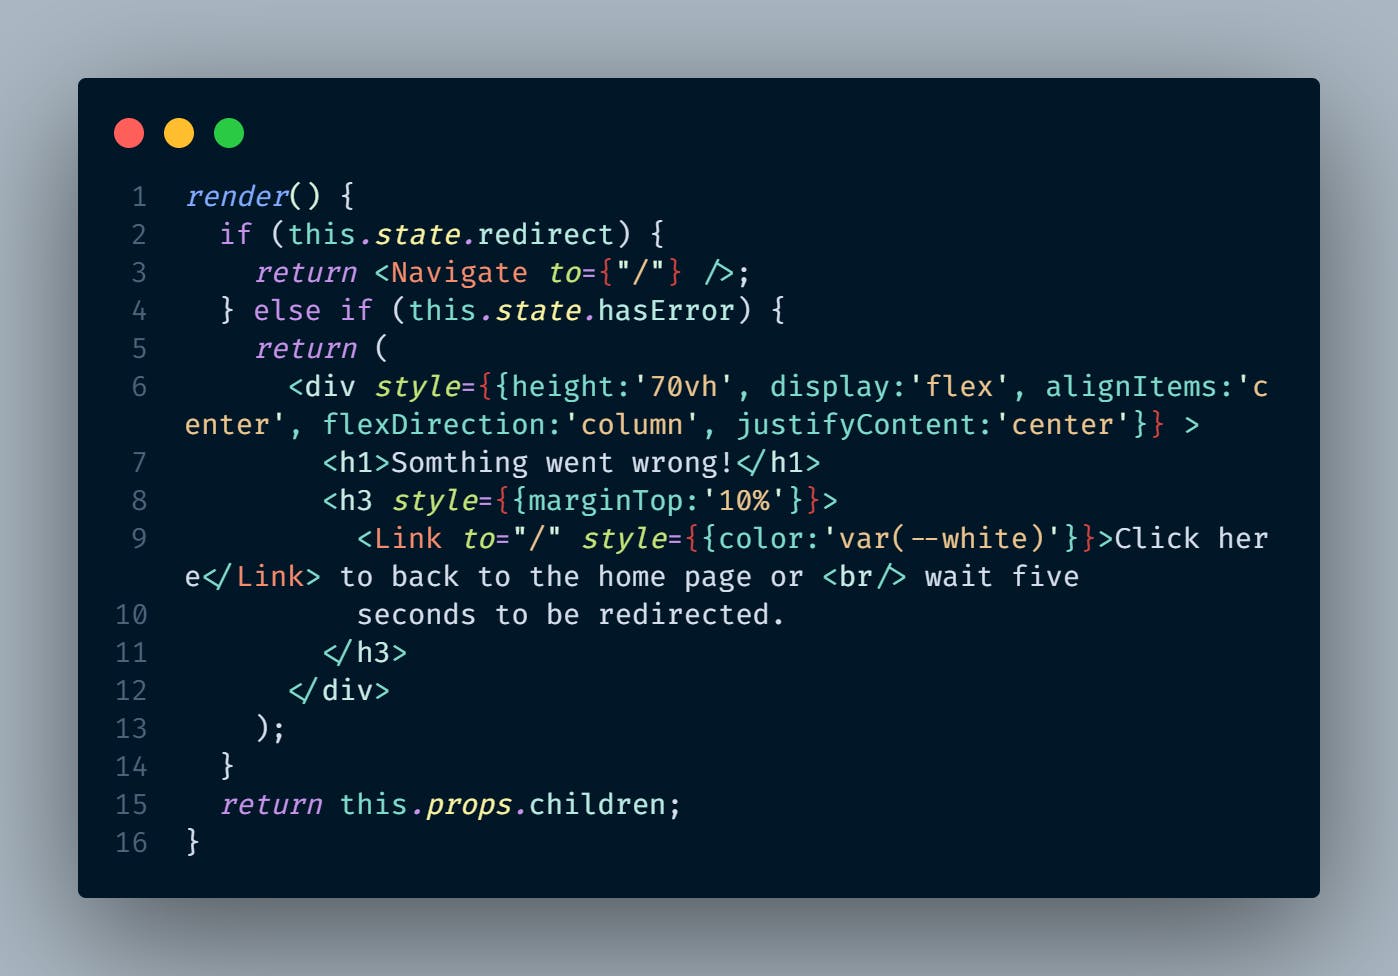
Next, I wrapped the errorPage component with the ErrorBounday component in the app.jsx.

Conclusion
I hope you enjoyed reading this article and maybe learned something.
I built this project under a lot of pressure and with very little time and I am happy with the turnout. This project helped sharpen my hard and soft skills and it challenged me to be productive even when the conditions are not convenient.
The source code is in my GitHub repository and this is the link to the live site.
Thanks for reading❤️
